Followers

Tuesday, November 22, 2016

DARK CHOCOLATE COOKIES


Who doesn't like to grab a cookie or a biscuit when in a hurry and for those instant sweet cravings. This cookie has the perfect combination of softness and crunchiness. The dark chocolate chunks provide the softness to the cookies & the cornflakes adds to the crunchiness. So bake it and enjoy the feeling of having a freshly baked cookie along with your cup of coffee or tea.

INGREDIENTS


2 cups (250gms)  All purpose flour (maida)
3/4 cup (180gms) Butter
3/4 cup (135gms) Brown sugar
1/4 cup (50gms) Castor sugar or regular grain sugar
1 tea spoon  Baking soda
1 tea spoon  Vanilla essence
200gms Dark Chocolate (chopped into small pieces)
1/2 cup Cornflakes (crushed lightly with hand)
2 table spoons  Boiling Water


METHOD

1. Take butter, brown sugar and castor sugar in a bowl and whisk it nicely.
2. Add boiling water to the baking soda and pour it into the butter and sugar mixture.
3. Add the vanilla essence.
4. Start mixing the flour lightly in batches.
5. Add the chopped chocolate and cornflakes.
6. Refrigerate the dough for about 30 minutes.
7. Preheat the oven at 150 degrees.
8. Grease a baking tray or line it with parchment paper.
9. Make small balls, flatten them a little and place them on the baking tray leaving a little gap between them.
10. Bake them for 25 minutes at 150 degrees.
11. Let them cool down on the baking tray and then serve.

NOTES

1. I have used regular salted butter here. You can even use unsalted butter in the same quantity, if it is easily available.
2.Leave gap between the cookies, while placing them on the baking tray as they will expand while baking.
3. The cookies on the tray should be of the same size or else the baking time for them will differ. If they are of different sizes the smaller ones might get burnt and the larger ones might remain uncooked.
4. To check the cookies if they are done, always check the bottom of the cookies. The top might look undone but if the bottom has browned nicely, switch off the oven.
5. The cookies might appear soft initially but once they cool down they will turn crisp.
6. Always let the cookies cool down completely on the baking tray.
7. The dough can be made one or two days in advance and kept in the refrigerator.

PICTORIAL GUIDE

1. Take butter, brown sugar and castor sugar in a bowl and whisk it nicely.


2. Add boiling water to the baking soda and pour it into the butter and sugar mixture.
3. Add the vanilla essence.
4. Start mixing the flour lightly in batches.


5. Add the chopped chocolate and cornflakes.


6. Refrigerate the dough for about 30 minutes.
7. Preheat the oven at 150 degrees.
8. Grease a baking tray or line it with parchment paper.
9. Make small balls, flatten them a little and place them on the baking tray leaving a little gap between them.
10. Bake them for 25 minutes at 150 degrees.
11. Let them cool down on the baking tray and then serve.


                                                            HAPPY BAKING!! :))


Saturday, November 19, 2016

CHEESE CAPSICUM CARROT SANDWICH


This is our family's go to sandwich, whenever there are sudden hunger pangs, this is one of the sandwiches that I think of and it turns out to be pretty filling with all the veggies going in and a bit of cheese to make it exciting for the kids too. So this cheese capsicum carrot sandwich works well for both breakfast as well as for evening snacks.

INGREDIENTS

10  Brown bread slices
1   Carrot grated
1/2  Capsicum chopped finely
1  Onion chopped finely
1/4 cup boiled sweet corn kernels
1/4 cup grated processed cheese
1  tea spoon black pepper
Salt as per taste (processed cheese also contains salt so be careful while adding salt)
Butter for toasting


METHOD

1. In a bowl or plate take all the ingredients except butter & bread.
2. Mix the ingredients together.
3. Take a slice of bread & apply the mixture evenly on it. Take another slice & put it on the bread covered with the vegetable cheese mixture.
4. Apply butter on the bread which is on top.
5. Heat a tawa or griddle and place the buttered side down on the tawa.
6. Let it brown from one side then apply butter on the other side & turn it over. Let it brown from the other side too.
7. Remove it from the tawa once it turns crisp from both the sides.You can also make this sandwich in a sandwich toaster.
8. Serve hot along with tomato ketchup or coriander chutney.

PICTORIAL GUIDE

1. In a bowl or plate take all the ingredients except butter & bread.


2. Mix the ingredients together.


3. Take a slice of bread & apply the mixture evenly on it. Take another slice & put it on the bread covered with the vegetable cheese mixture.


4. Apply butter on the bread which is on top.
5. Heat a tawa or griddle and place the buttered side down on the tawa.


6. Let it brown from one side then apply butter on the other side & turn it over. Let it brown from the other side too.


7. Remove it from the tawa once it turns crisp from both the sides.You can also make this sandwich in a sandwich toaster.


8. Serve hot along with tomato ketchup or coriander chutney.

HAPPY COOKING!! :)))


Tuesday, November 15, 2016

SAMBAR WITH FRESH HOME MADE SAMBAR MASALA


This is a recipe that I learnt after my marriage, this is my mother in law's special sambar recipe which uses fresh home made sambar masala. It has a distinct flavour of its own & once you taste this, you are not going to like the sambar made from market bought masala powders. There are various different ways that sambar is made in south indian households just like there are various ways one makes chole & rajma in north indian house holds, but this is a typical Malayali way of making sambar.

INGREDIENTS FOR SAMBAR MASALA
Coconut (grated) 1/2 cup
Coriander seeds (sabut dhaniya) 1 table spoons
Fenugreek seeds (methi dana) 1 tea spoon 
Asafoetida (heeng) 1/2 tea spoon
Split husked black gram-  (urad dhuli dal) 1 teaspoon
Dry red chillies (sukhi lal mirch) 2-3 or 1 table spoon of red chilli powder (you can increase or decrease the quantity depending upon how spicy you want it to be)
Onion shallots (choti pyaz) 4-5 (depending upon the size)
Curry leaves (kari patta) 1/4 cup
Oil 2 table spoons


METHOD

1. Take oil in a pan, when the oil becomes hot add asafoetida(heeng) to it, then add urad dal, methi dana, sabut dhaniya. Fry them for a few seconds then add onion shallots, dry red chillies, curry leaves & grated coconut to it. Fry it till it gets evenly browned. If using powdered dhaniya & chilli then add it once you have roasted the whole spices.


2. Let it cool down and grind it in a mixer by adding a little bit of water .


3. Use this fresh masala to prepare sambar or this masala can be made and stored in the refrigerator for 1-2 days.


INGREDIENTS FOR SAMBAR

2  Potatoes (diced)
3  Onions (diced)
1  Carrot (diced)
2  Tomatoes (diced)
2-3 Lady's finger (bhindi/okra)
I haven't used them as the kids don't prefer them but it is an important part of this sambar. If you plan to use them, cut them, take a small pan, add a little oil & fry them lightly. Do not add them to the cooker along with other vegetables while boiling. Add them just before adding the tamarind & sambar masala.
1-2  Drumsticks, cut lengthwise ( I didn't get it here so I haven't used it)
1/2 cup tuvar dal or arhar dal (pigeon pea lentils)
1 tea spoon turmeric powder (haldi)
Salt to taste
Freshly prepared sambar masala
2 table spoons tamarind (imli)
1-2 green chillies ( slit into half lengthwise)
2 cups water
Fresh coriander (hara dhaniya) for garnish


FOR TEMPERING (TADKA/CHAUNK) OF SAMBAR

2  table spoons oil
1  tea spoon mustard seeds ( rai/sarson)
1/2  tea spoon split husked black gram (urad dhuli dal)
2  whole dry red chillies ( sukhi lal mirch)
1/2 tea spoon fenugreek seeds (methi dana)
12- 15 curry leaves ( kari patta )

METHOD

1. Soak the tamarind in water and keep aside.
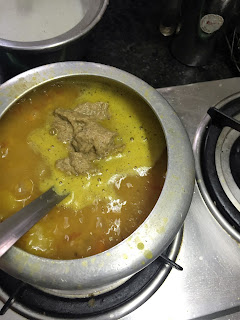
2. Wash & rinse the dal, put it in the pressure cooker along with diced potatoes, onions, tomatoes, carrots (you can use vegetables of your choice, these are the preferred vegetables at my house).
3. Add  water, salt, haldi & green chillies to the pressure cooker, close the lid & allow it to cook for 4-5 whistles on medium to high flame.
4. Allow the pressure to settle down on its own. Once done, open the lid and check, the dal & vegetables should turn soft & mushy.
5. Squeeze the water from the soaked tamarind (discard the pulp) and add the tamarind water to the dal & vegetable mixture.
6. Add the freshly prepared sambar masala to the cooker. 
7. If you feel the sambar is thick add a little bit of water. Let it simmer for a few minutes till it reaches the desired consistency.

FOR TEMPERING (TADKA/CHAUNK)

1. Heat oil in a small pan, add mustard seeds to it, let them crackle.
2. Add urad dal, methi dana & sabut lal mirch.
3. Switch off the gas & add karipatta to it.
4. Add the tempering (tadka/chaunk) to the sambar and close the lid for a few minutes.
5.Garnish with fresh coriander leaves. Serve hot with idli, dosa, vada or rice.

PICTORIAL GUIDE FOR SAMBAR

1. Soak the tamarind in water and keep aside.


2. Wash & rinse the dal, put it in the pressure cooker along with diced potatoes, onions, tomatoes, carrots (you can use vegetables of your choice, these are the preferred vegetables at my house).


3. Add  water, salt, haldi & green chillies to the pressure cooker, close the lid & allow it to cook for 4-5 whistles on medium to high flame.


4. Allow the pressure to settle down on its own. Once done, open the lid and check, the dal & vegetables should turn soft & mushy.
5. Squeeze the water from the soaked tamarind (discard the pulp) and add the tamarind water to the dal & vegetable mixture.


6. Add the freshly prepared sambar masala to the cooker. 


FOR TEMPERING (TADKA/CHAUNK)

1. Heat oil in a small pan, add mustard seeds to it, let them crackle.
2. Add urad dal, methi dana & sabut lal mirch.
3. Switch off the gas & add karipatta to it.


HAPPY COOKING!! :)))


Wednesday, November 2, 2016

GINGER CINNAMON COOKIES


So it is that time of the year, when there is a slight dip in the temperature. Winter is calling and you can feel the nip in the air. Mornings and evenings have become cooler & at this time of the year who doesn't like to have a hot cup of tea with your favourite cookies.
As the name suggests these GINGER & CINNAMON COOKIES are perfect for these winter months with ginger & cinnamon providing the warmth in the cold evenings. Once you bake them your house is going to be full of the nice aroma of freshly baked GINGER CINNAMON COOKIES.

INGREDIENTS

All purpose flour (maida)  2 cups/250 gms

Butter 200 gms

Castor sugar or powdered sugar  1/2 cup/125gms

Ginger juice (adrak ka ras)  2 tea spoons (grate fresh ginger & strain it to get the juice)

Cinnamon powder ( dalchini)  1 tea spoon

Nutmeg powder (jaiphal)  1 tea spoon (optional)


METHOD

1. Take the butter and powdered sugar in a bowl and whisk it together till it becomes soft and fluffy.
2. Slowly fold in the all purpose flour with a spatula.
3. Add the ginger juice, cinnamon powder and nutmeg powder and mix it till you get a dough.
4. Take a cling film, place the dough on it and shape it into a log. Wrap it in the cling film & refrigerate the dough for two hours or till the butter solidifies.
5. Line your baking tray with parchment paper. Pre heat the oven to 150 degrees.
6. Cut the dough in equal size pieces and lay them on the tray.
7. Bake for 10-15 minutes or till the edges start browning. Enjoy the cookies with a hot cup of tea :)

NOTES 

1. Butter should be softened & not melted.
2. If not using castor sugar, take the granulated sugar, powder it finely & then sieve it once to get finely powdered sugar.
3. Instead of ginger juice, ginger powder can also be used but increase the quantity to 1 & a half to 2 table spoons.
4. Check that the cookies are of the same size or else they will not bake evenly. 
5. Do not wait for the top of the cookies to turn brown or else they will burn from the bottom. Baking time differs for every oven so check after 10 minutes if you see the sides browning, switch it off.
6. Place the baking tray in the middle rack of the oven & bake with only the lower element on.
7. The cookies will be soft when you check them for doneness but will turn hard once they cool down. Let them cool down on the baking tray completely.
8. The dough can be made and kept in the fridge for a week.

PICTORIAL GUIDE 

1. Take the butter and powdered sugar in a bowl and whisk it together till it becomes soft and fluffy.


2. Slowly fold in the all purpose flour with a spatula.


3. Add the ginger juice, cinnamon powder and nutmeg powder and mix it till you get a dough.


4. Take a cling film, place the dough on it and shape it into a log. Wrap it in the cling film & refrigerate the dough for two hours or till the butter solidifies.


5. Line your baking tray with parchment paper. Pre heat the oven to 150 degrees.
6. Cut the dough in equal size pieces and lay them on the tray.


7. Bake for 10-15 minutes or till the edges start browning. Enjoy the cookies with a hot cup of tea :)


HAPPY BAKING :)))