
I had been planning to make a gravity defying cake since long but every time I used to plan it for any of the birthdays my daughters would come up with some other cartoon or princess themed cake.
So this time I thought I would make it as a surprise for them for Children's day.

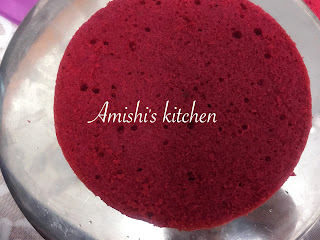
I've used a Red Velvet Cake as the base cake as one of my friends had been pestering to bake one for her. So I thought a red velvet gravity defying cake will solve both the purposes. Me happy, kids happy and ofcourse my friend too very happy.

You can use any of your favourite cakes as the base. You can also use this EGGLESS RED VELVET CAKE recipe or POUND CAKE recipe or EGGLESS CHOCOLATE CAKE recipe that I've posted earlier.
I've made this gravity defying cake with whipped cream but for the first try you can make it with DARK CHOCOLATE GANACHE as chocolate ganache holds the cake well and will support the gems structure easily.
INGREDIENTS
FOR THE BASE
6-7 inch cake - 1 (flavor of your choice or you can choose from eggless red velvet, pound cake or eggless chococlate cake
Frosting of your choice I've used whipped cream you can use chocolate ganache
Sugar syrup
Sugar 1/4 cup
Water 3/4 cup
Boil water and sugar for 2 minutes. Switch off the gas and keep aside to cool.
FOR THE GRAVITY DEFYING STRUCTURE
Thick straw like the ones you get in Mc Donalds
Melted chocolate 1/2 cup
Gems and M&M depending upon the quantity required
ASSEMBLING THE CAKE
1. Keep the cake in the fridge for a few hours before icing it. It makes the process of cutting and icing the cake easier.


2. Take chilled heavy whipping cream in a bowl and beat it till you achieve stiff peaks. Keep it in the fridge till further use.
Heavy whipping cream already has sugar added to it and hence there is no requirement of adding sugar to it. It takes 8-10 minutes to beat the cream to stiff peaks at high speed, depending upon the quantity. Amul cream does not qualify as heavy whipping cream and it is difficult to attain stiff peaks in it.
3. Divide the cake into two or three round halves depending upon the height of the cake. If the cake has an uneven top just cut it lightly from the top to get a flat surface.


4. Place one half of the cake on a cake board or a flat plate and soak it with the prepared sugar syrup.

5. Take the required amount of whipped cream and cover one layer of the cake all over with it.

6. Place the other layer over it, soak it with sugar syrup and apply the frosting.


7. Repeat the process with the third layer.


8. Apply the whipped cream and cover it nicely all over. Using a palette knife smoothen it from all the sides. Keep in the refrigerator to chill for about half an hour.
9. Take it out from the fridge and apply another layer of whipped cream to get a smooth outer finish.
I was in so much hurry to reach the next step of applying gems and M&M's that I forgot to take a pic of these two steps but you can see the frosted cake in the pictures so you will get an idea of how it looked.
I've not given a very thick layer of icing as my elder one doesn't like too much of icing and also because I wanted a little bit of red of red velvet cake to peep out.
ASSEMBLING THE STRAW AND GEMS
1. Take about half a cup of chopped chocolate and melt it in the microwave. Do not put it for a longer time as it might burn just put it for 30 seconds remove and mix with a spoon. If not melted put it again 15-20 seconds depending upon the consistency of your chocolate. Melted chocolate should not be very thin but a little thick so that the gems and m&m's can easily stick to the straw.

2. Insert the straw in the centre of the cake till it reaches the base and I forgot to take a pic here again.

3. Now start applying a little bit of melted chocolate on the straw and start sticking gems on it one by one. Do not apply melted chocolate on the whole straw together as you will not be able to stick the gems so quickly and the chocolate will dry up and harden.


5. Place the remaining gems on the cake to give a flowing effect. You don't need to apply melted chocolate here as they will stick to the icing. If you want them to flow to the cake board too the way I have done then apply a bit of melted chocolate on the cake board and stick the gems.
Your gravity defying gems cake is ready to surprise your kids.
Do safe guard the cake from your kids if making for a party. My cake was not fitting into my fridge and hence my kids wanted to cut it as soon as they saw it.


