Followers

Wednesday, February 15, 2017

DRY VEGETABLE MANCHURIAN


We have a lot of get togethers at our home and I need to think of a lot  of starters for them which are liked by the majority.
Chinese cuisine is one of the most popular cuisines in our country though we've twisted it to suit our taste buds and it is more of an Indo-Chinese dish now but guess that is how we like it.
I do not use aginomoto while making noodles or manchurian.
I prepare the Manchurian balls a day ahead when I'm making them for a party or get together and toss them in the sauce when it is time to serve.

INGREDIENTS

for Manchurian balls

1/2 cup grated or finely chopped cabbage
1/4 cup grated carrot
1/4 cup finely chopped capsicum
1/4 cup finely chopped spring onions
2 -3 table spoons maida ( all purpose flour)
2 table spoons corn flour
salt and pepper to taste
oil for frying

for the sauce

1/4 cup chopped spring onions (keep the greens aside for garnishing)
1 tea spoon minced or grated garlic
1 tea spoon grated ginger
1 table spoon oil
1 table spoon tomato ketchup
1/2 table spoon soya sauce
1 tea spoon red chilli sauce
1/2 tea spoon vinegar
1 tea spoon corn flour
salt and pepper to taste
Spring onion greens for garnishing

METHOD

for Manchurian balls

1. Take all the chopped vegetables in a bowl. 
2. Add maida, corn flour, salt and pepper to the vegatables.
3. Mix everything together and shape into lemon sized balls.
4. Heat oil in a pan or kadai and deep fry the Manchurian balls till golden brown.
5. Once done remove from the oil and put them on a kitchen paper towel to drain the excess oil.

Preparing the sauce

1. Mix together tomato ketchup, chilli sauce, soya sauce, vinegar, salt and pepper. Keep aside.
2. Take a table spoon of oil in a pan. Add ginger and garlic to it.
3. Cook for a few seconds, add the chopped spring onions to it. Let them cook for a minute.
4. Once the onions turn soft add the mixture of all the sauces.
5. Mix corn flour with  a table spoon of water and add to the pan.
6. Add the fried balls to the pan. Stir lightly for the sauce to coat the balls.
7. Once the sauce coats the balls evenly, switch off the gas. Top the cooked Manchurian balls with chopped spring onion greens. Serve hot.

PICTORIAL GUIDE

for Manchurian balls


1. Take all the chopped vegetables in a bowl. 


2. Add maida, corn flour, salt and pepper to the vegetables.


3. Mix everything together and shape into lemon sized balls.
4. Heat oil in a pan or kadai and deep fry the Manchurian balls till golden brown.


5. Once done remove from the oil and put them on a kitchen paper towel to drain the excess oil.


Preparing the sauce

1. Mix together tomato ketchup, chilli sauce, soya sauce, vinegar, salt and pepper. Keep aside.


2. Take a table spoon of oil in a pan. Add ginger and garlic to it.


3. Cook for a few seconds, add the chopped spring onions to it. Let them cook for a minute.


4. Once the onions turn soft add the mixture of all the sauces.


5. Mix corn flour with  a table spoon of water and add to the pan.


6. Add the fried balls to the pan. Stir lightly for the sauce to coat the balls.


7. Once the sauce coats the balls evenly, switch off the gas. Top the cooked Manchurian balls with chopped spring onion greens. Serve hot.


HAPPY COOKING!! 😊


Monday, February 13, 2017

CRISPY BRINJAL / EGGPLANT SNACK


We as a family are not really fond of brinjals, I'm the only one who likes brinjals but I too prefer it in the form of baingan ka bharta and not in the regular form.
I tasted this crispy brinjal snack at a friend's place and loved the crispiness and the tangy flavour that the sauce adds to it. I've used the longer variety of brinjals because it gives bite sized portions which can easily be served as snacks.

INGREDIENTS

2-3 brinjals the longer variety
1/4 cup corn flour
1/4 cup water
1/2 cup bread crumbs
1/2 tea spoon each of salt, pepper, oregano and chilli flakes ( you can adjust the seasonings according to your taste)
2 table spoons chopped coriander

RED SAUCE

1/2 cup readymade tomato puree
2 medium tomatoes, pureed in the mixer
1 table spoon oil
1/2 tea spoon minced garlic
1/2 tea spoon chilli flakes
1 tea spoon oregano
1 tea spoon sugar
salt to taste
cheese spread or sour cream for topping
METHOD

1. Cut the brinjal into round slices, wash them and pat dry them with a paper towel.
2. Take 2-3 bread slices and churn them in the mixture to make bread crumbs.
3. Mix corn flour and water to make a batter.
4. Add all the seasonings and chopped coriander to the bread crumbs.
5. Dip the dried brinjals in the corn flour batter.
6. Press over the bread crumbs mixture 2-3 times so that the bread crumbs mixture sticks well. Keep aside.

RED SAUCE

1. Heat oil in a pan. Add the garlic to the pan.
2. Add the pureed tomatoes to the pan. Cook for a minute.
3. Add the readymade tomato puree to it and cook for a few more minutes.
4. Add all the seasonings to the sauce and cook till it reaches a thick consistency. Switch of the gas.

ASSEMBLING

1. Take the bread crumb coated brinjals and deep fry them till brown. For extra crispiness you can deep fry all the brinjals once and keep aside and at the time of serving deep fry them once again.
2. For serving take individual slices top them with the cooked tomato sauce. Add a blob of cheese spread or sour cream on top of it. Garnish with coriander leaves.

PICTORIAL GUIDE

1. Cut the brinjal into round slices, wash them and pat dry them with a paper towel.


2. Take 2-3 bread slices and churn them in the mixture to make bread crumbs.
3. Mix corn flour and water to make a batter.


4. Add all the seasonings and chopped coriander to the bread crumbs.


5. Dip the dried brinjals in the corn flour batter.


6. Press over the bread crumbs mixture 2-3 times so that the bread crumbs mixture sticks well. Keep aside.


ASSEMBLING

1. Take the bread crumb coated brinjals and deep fry them till brown. For extra crispiness you can deep fry all the brinjals once and keep aside and at the time of serving deep fry them once again.
2. For serving take individual slices top them with the cooked tomato sauce. Add a blob of cheese spread or sour cream on top of it. Garnish with coriander leaves.


                                   HAPPY COOKING!! 😊


Wednesday, February 8, 2017

CREAM OF CHICKEN SOUP


This is a basic chicken soup recipe that I make very often at home.
This chicken soup recipe uses very basic ingredients, I have not used any sauces in it and so kids also can have it easily. This is a basic recipe and you can adjust the flavours according to your taste while making this chicken soup.

My daughters enjoy having this chicken soup during winters. As I've started reducing the use of maida(all purpose flour) at home, I have used regular aata (wheat flour) to make this chicken soup. You can easily substitute the aata with maida.
I've used boneless chicken here you can use chicken with bones and after boiling the chicken you can discard the bones and use the stock.

INGREDIENTS

1 cup chicken
2 cups water
1 bay leaf ( tej patta)
1 table spoon aata ( wheat flour)
1 table spoon butter
1 cup milk
1 tea spoon salt
1/2 tea spoon pepper


METHOD

1. Take 2 cups water in a pan. Add the bay leaf and 1/2 tea spoon salt to it. Add the chicken to it. Bring it to a boil then simmer covered on low heat for 7-8 minutes or till the chicken becomes tender. Let it cool.
2. Remove the chicken pieces from the stock, reserving the stock. If using chicken with bones, remove all the meat from the bones and discard the bones. Discard the bay leaf too.
3. In a heavy bottomed pan, take butter, add aata or maida to it.
Cook on low heat till it turns golden.
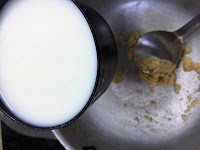
4. Add the milk slowly. Keep stirring continuously to avoid lumps.
5. Add the reserved stock. Bring it to a boil.
6. Add salt and pepper.
7. Add the shredded chicken.
8. Let it simmer on low heat for 2 minutes. Check the seasonings. Serve hot.


PICTORIAL GUIDE
1. Take 2 cups water in a pan. Add the bay leaf and 1/2 tea spoon salt to it. Add the chicken to it. Bring it to a boil then simmer covered on low heat for 7-8 minutes or till the chicken becomes tender. Let it cool.
2. Remove the chicken pieces from the stock, reserving the stock. If using chicken with bones, remove all the meat from the bones and discard the bones. Discard the bay leaf too.


3. In a heavy bottomed pan, take butter, add aata or maida to it.
Cook on low heat till it turns golden.


4. Add the milk slowly. Keep stirring continuously to avoid lumps.


5. Add the reserved stock. Bring it to a boil.


6. Add salt and pepper.
7. Add the shredded chicken.


8. Let it simmer on low heat for 2 minutes. Check the seasonings. Serve hot.


HAPPY COOKING!! 😊


Monday, February 6, 2017

GAJAR KA HALWA / CARROT HALWA


Gajar ka halwa or carrot halwa is the most common dessert which is served in North India during the winter season. The sight of fresh  red carrots in the market takes me back to my child hood. I remember my mother grating the carrots for the halwa and me and my brother would just run away with a carrot from the whole lot of carrots.

This carrot halwa recipe is my mother's recipe, this is the way I've learnt it and this is the way we all love it :)
This Carrot halwa recipe needs a little more time to be cooked as it is simmered on low heat but once you taste the halwa, all the time and energy that goes into making it seems worth the effort.

INGREDIENTS

1 kg  red, juicy and tender carrots
1 litre full cream milk
250 gms khoya (evaporated milk solids)
250 gms sugar ( you can reduce the amount of sugar a little if you prefer your halwa to be less sweet)
dry fruits of your choice kaju(cashews), kishmish(raisins), badam(almonds)

METHOD

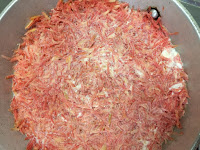
1. Wash, peel and grate the carrots and keep aside.
2. In a deep heavy bottomed pan or kadai add the carrots and the milk. You can either add all the milk at once or if the pan is not very deep, add enough milk to cover the carrots first and then slowly keep on adding the milk till all of it is used.
3. Put it on medium flame and let the carrot and milk mixture come to a boil.
4. Simmer the mixture on low flame. Keep stirring it at regular intervals. The mixture should not stick to the bottom of the pan or kadai.
5. Slowly the milk will start reducing.
6. Once you see that most of the milk is evaporated and absorbed by the carrots, add the sugar.
7. Gradually the sugar will melt, keep stirring at regular intervals.
8. Once all the sugar has been absorbed add the khoya to it.
9. Keep stirring it till it gets mixed nicely. You can add the dry fruits of your choice at this point. I have not added them as my kids like the halwa without the dry fruits.
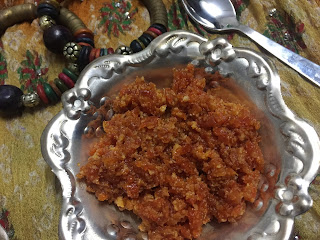
10. Switch off the gas once everything is mixed nicely. Gajar ka halwa can be served hot as well as cold whichever way you prefer.

PICTORIAL GUIDE

1. Wash, peel and grate the carrots and keep aside.


2. In a deep heavy bottomed pan or kadai add the carrots and the milk. You can either add all the milk at once or if the pan is not very deep add enough milk to cover the carrots first and then slowly keep on adding the milk till all of it is used.


3. Put it on medium flame and let the carrot and milk mixture come to a boil.


4. Simmer the mixture on low flame. Keep stirring it at regular intervals. The mixture should not stick to the bottom of the pan or kadai.
5. Slowly the milk will start reducing.


6. Once you see that most of the milk is evaporated and absorbed by the carrots, add the sugar.


7. Gradually the sugar will melt, keep stirring at regular intervals.


8. Once all the sugar has been absorbed add the khoya to it.


9. Keep stirring it till it gets mixed nicely. You can add the dry fruits of your choice at this point. I have not added them as my kids like the halwa without the dry fruits.


10. Switch off the gas once everything is mixed nicely. Gajar ka halwa can be served hot as well as cold whichever way you prefer.


HAPPY COOKING!! 😊